Website performance plays an important role in user experience and search engine rankings. One of the key aspects that significantly impact website loading speed is browser caching. Browser caching involves storing static resources like images, stylesheets, and scripts locally on a user’s device, allowing the browser to load them faster when the user revisits the site. In this blog post, we’ll explore how to leverage browser caching using the .htaccess file in a WordPress website.
Understanding Browser Caching
When a user visits a website, the browser downloads various resources such as images, stylesheets, scripts, and more. These resources are then stored in the browser’s cache so that when the user navigates to another page on the same website or returns to it later, the browser can retrieve these resources from the cache rather than re-downloading them from the server. This results in super faster page load times and reduced server load.
The .htaccess File
The .htaccess file is a configuration file used on Apache web servers to control various aspects of how a website behaves. It can be a powerful tool for optimizing website performance and security. To leverage browser caching for a WordPress website, you’ll need to modify the .htaccess file.
Before making any changes to the .htaccess file, it’s recommended to create a backup of that file. Mistakes in this file can lead to website errors, so proceed with caution.
Leveraging Browser Caching WordPress with .htaccess
To leverage browser caching, you need to set expiration dates for different types of resources. This tells the browser how long it should keep certain resources cached. Here’s how you can do it using the .htaccess file:

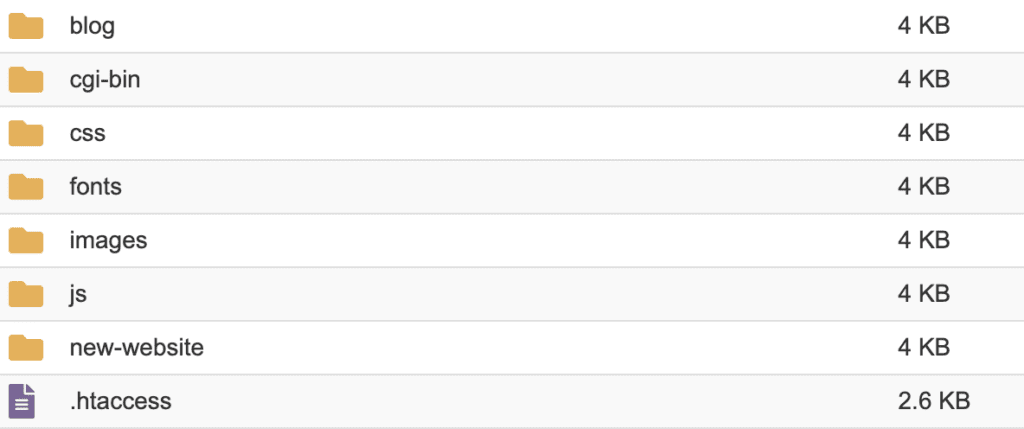
If you are not able to find .htaccess on your cpanel click on the top right settings and enable the show hidden files checkbox

- Access your hosting website’s root directory via FTP or Cpanel’s File Manager.
- In the publichtml folder the .htaccess file and download a backup copy to your computer.
- Open the .htaccess file using a text editor or any suitable code editor.
- Add the below Leverage Browser Caching code to the .htaccess file:
## Leverage Browser Caching ##
<IfModule mod_expires.c>
  ExpiresActive On
  ExpiresByType image/jpg "access plus 1 year"
  ExpiresByType image/jpeg "access plus 1 year"
  ExpiresByType image/gif "access plus 1 year"
  ExpiresByType image/png "access plus 1 year"
  ExpiresByType text/css "access plus 1 month"
  ExpiresByType application/pdf "access plus 1 month"
  ExpiresByType text/x-javascript "access plus 1 month"
  ExpiresByType application/x-shockwave-flash "access plus 1 month"
  ExpiresByType image/x-icon "access plus 1 year"
  ExpiresDefault "access plus 2 days"
</IfModule>
## Leverage Browser Caching ##- Save the file and upload it back to your website’s root directory, replacing the existing .htaccess file.
Understanding the Code
In the code snippet above, we are using the mod_expires module to set expiration dates for different types of resources. For example:
Images (jpg, jpeg, gif, png, icon) are set to expire after 1 year.
1-month expiration is set to the CSS File.
1-month expiration is set to PDFs and Javascript file
1-month expiration set to Flash files.
Default 2 days expiration is set to the other resources.
Leveraging browser caching using the .htaccess file can significantly improve your WordPress website’s loading speed and overall performance. By setting appropriate expiration dates for various types of resources, you can reduce the number of requests sent to the server and enhance the user experience. Remember to always test your website after making changes to the .htaccess file to ensure that everything is working as expected. Additionally, consider combining this optimization technique with other performance-enhancing practices to achieve the best results for your website.


