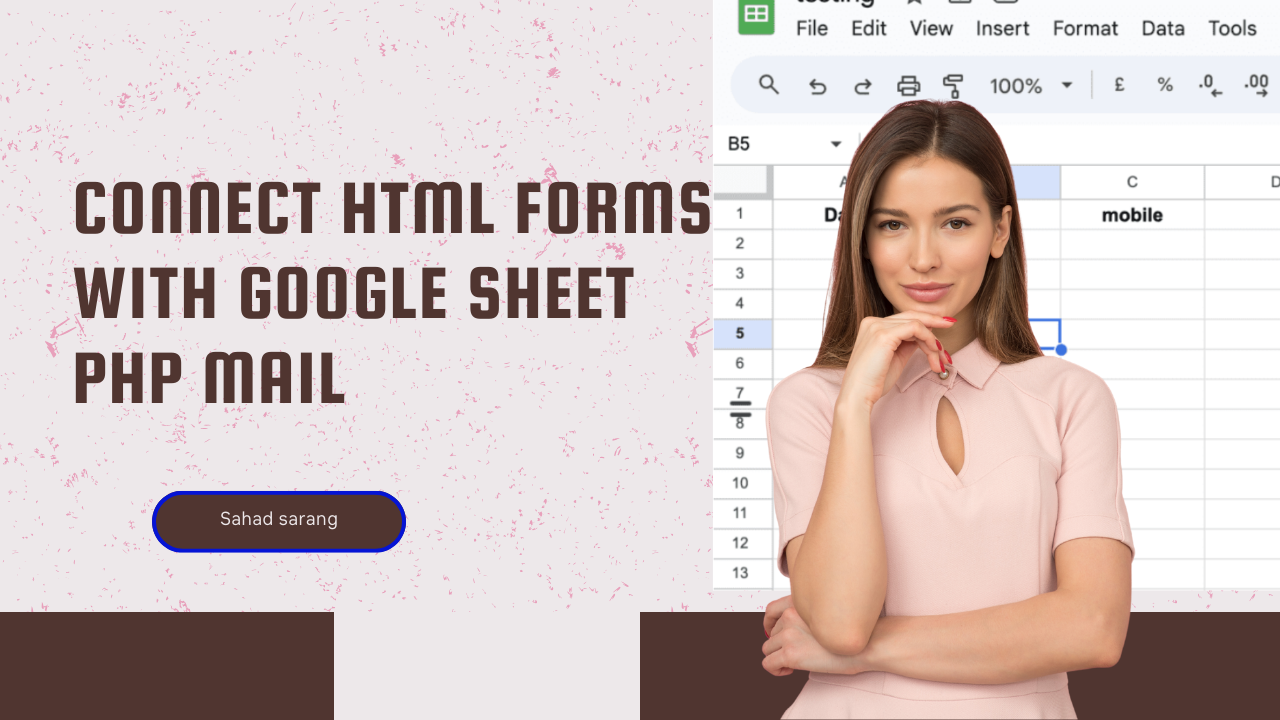
In this blog, we’ll walk you through the process of connecting HTML forms with Google Sheets and sending email notifications using PHPMailer in PHP. First, we will explain how to submit an HTML form to Google Sheets. By learning how to connect an HTML form to Google Sheets, you can ensure that all your form submissions are automatically saved to your spreadsheet, making data handling efficient and reliable. We will describe the use of Google Apps Script for HTML form submission and show how to use a PHP form to Google Sheets. This includes setting up your HTML form, writing the necessary PHP code, and ensuring your form submissions are logged in your Google Sheets document.
We will cover various methods and best practices on how to submit an HTML form to Google Sheets, including troubleshooting common issues. You will also learn how to set up email notifications using PHPMailer in PHP, ensuring you stay updated with real-time data insights. This guide will not only help you submit HTML forms to Google Sheets but also enhance your data management strategy with efficient workflows.
Setting Up Google Sheets:
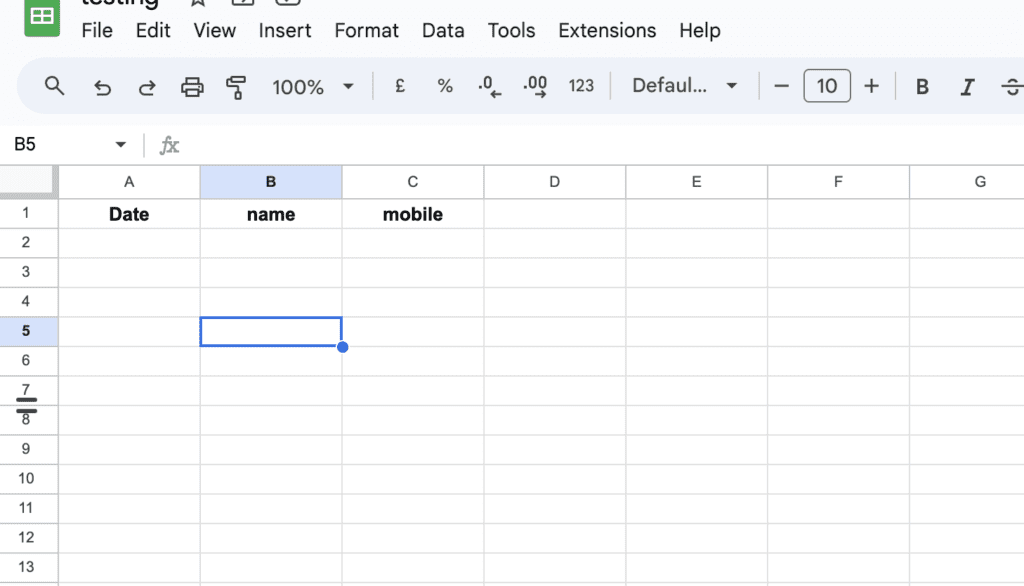
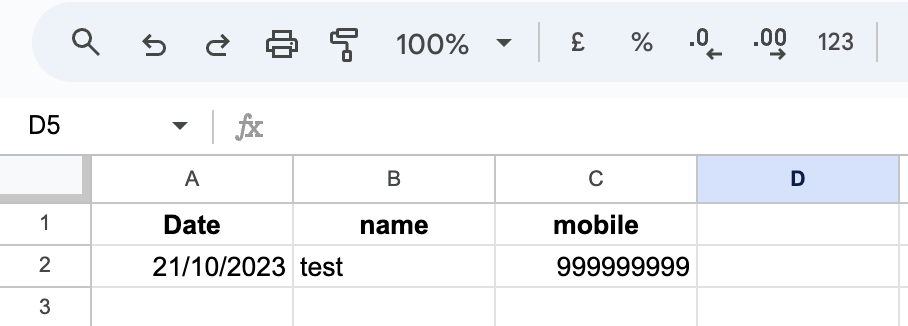
Before we begin connecting HTML forms, ensure you have a Google Sheets document ready. This will serve as the destination for your form submissions. In the Google Sheet, you need to add all the HTML Form Fields like name, mobile, email, etc…
Creating an HTML Form:
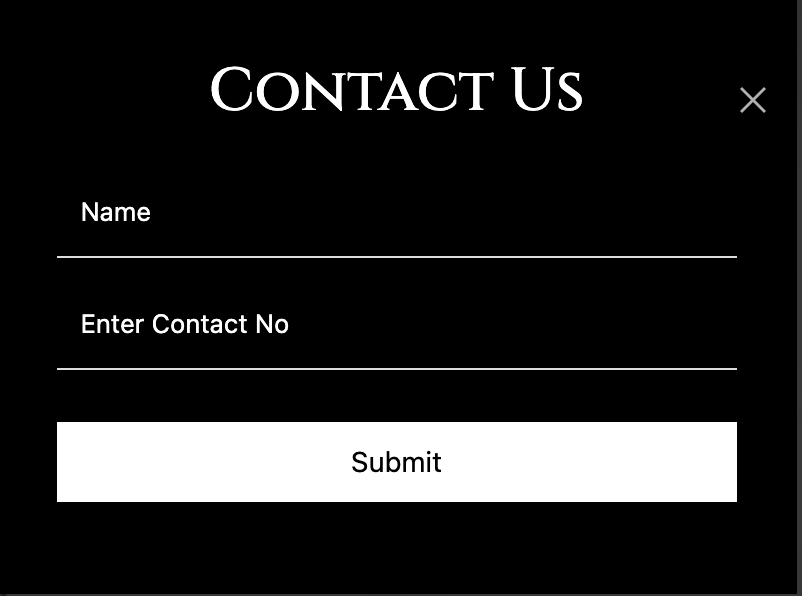
- Start by designing your HTML form using standard form elements like text fields, dropdown, and submit buttons.
- Add the necessary form fields and labels to collect the desired information from users. like we have added below
Connecting the HTML Form to Google Sheets:
To connect your HTML form to Google Sheets, follow these steps:
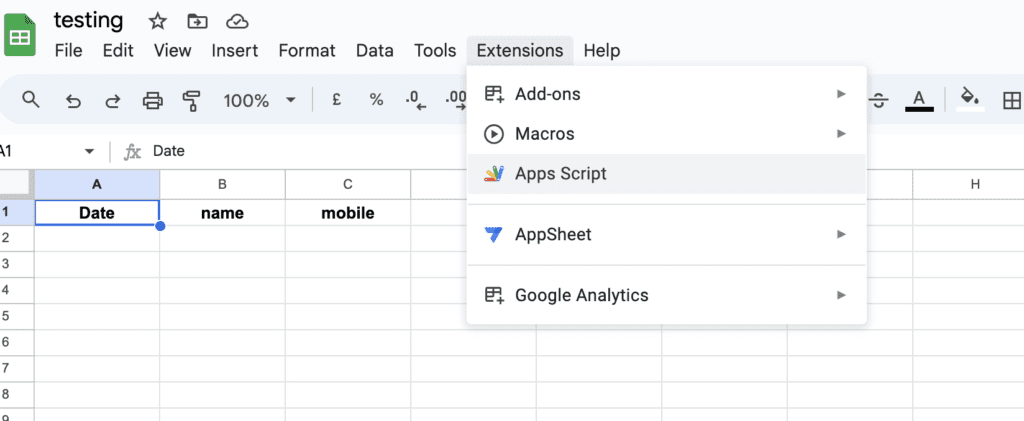
- Open your Google Sheets document
- Click on the Extensions menu and select the Apps Script option
- In the Apps Script editor, write a script to capture form submissions and append them to the Google Sheet. Added the script code bottom so you can use it easily
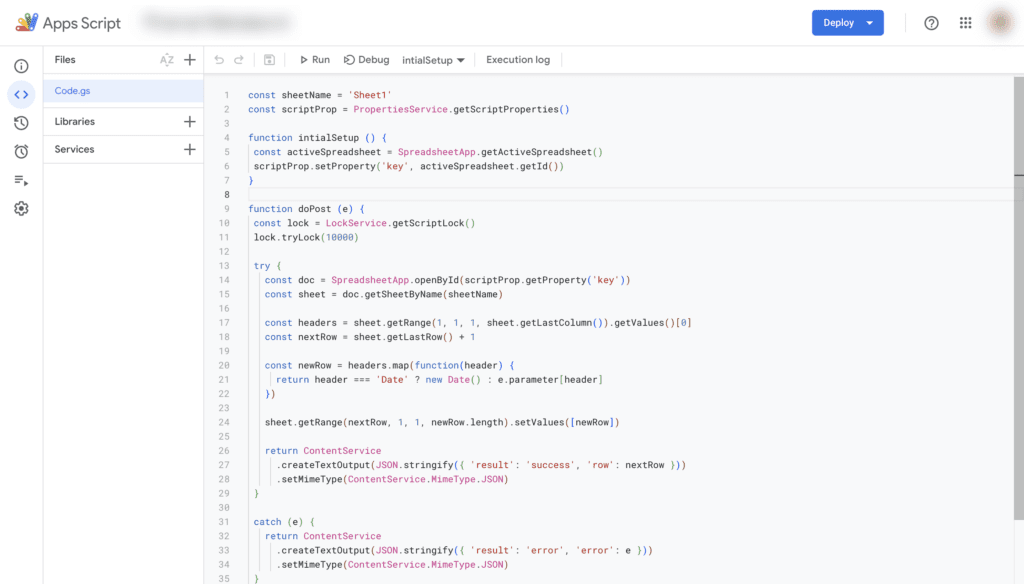
const sheetName = 'Sheet1'
const scriptProp = PropertiesService.getScriptProperties()

function intialSetup () {
 const activeSpreadsheet = SpreadsheetApp.getActiveSpreadsheet()
 scriptProp.setProperty('key', activeSpreadsheet.getId())
}

function doPost (e) {
 const lock = LockService.getScriptLock()
 lock.tryLock(10000)

 try {
   const doc = SpreadsheetApp.openById(scriptProp.getProperty('key'))
   const sheet = doc.getSheetByName(sheetName)

   const headers = sheet.getRange(1, 1, 1, sheet.getLastColumn()).getValues()[0]
   const nextRow = sheet.getLastRow() + 1

   const newRow = headers.map(function(header) {
     return header === 'Date' ? new Date() : e.parameter[header]
   })

   sheet.getRange(nextRow, 1, 1, newRow.length).setValues([newRow])

   return ContentService
     .createTextOutput(JSON.stringify({ 'result': 'success', 'row': nextRow }))
     .setMimeType(ContentService.MimeType.JSON)
 }

 catch (e) {
   return ContentService
     .createTextOutput(JSON.stringify({ 'result': 'error', 'error': e }))
     .setMimeType(ContentService.MimeType.JSON)
 }

 finally {
   lock.releaseLock()
 }
}- After implementing the code click on allow review permissions to your account

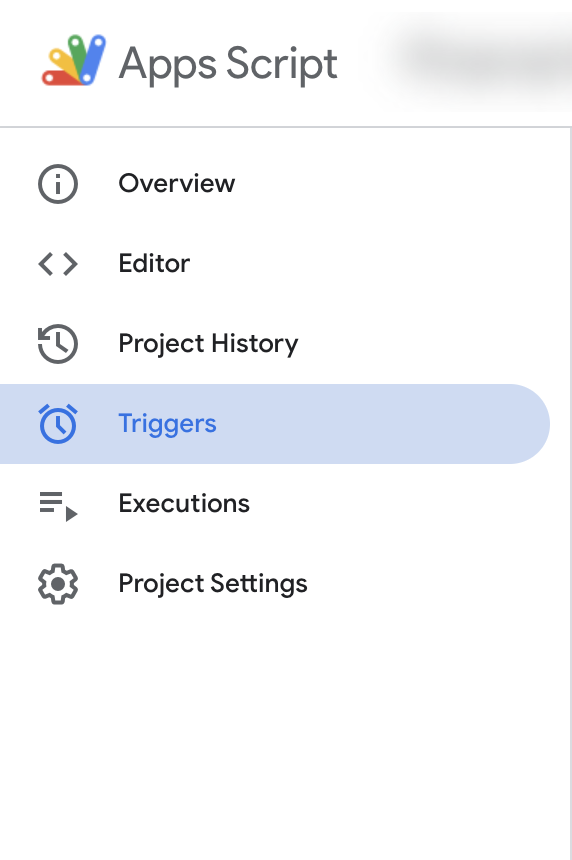
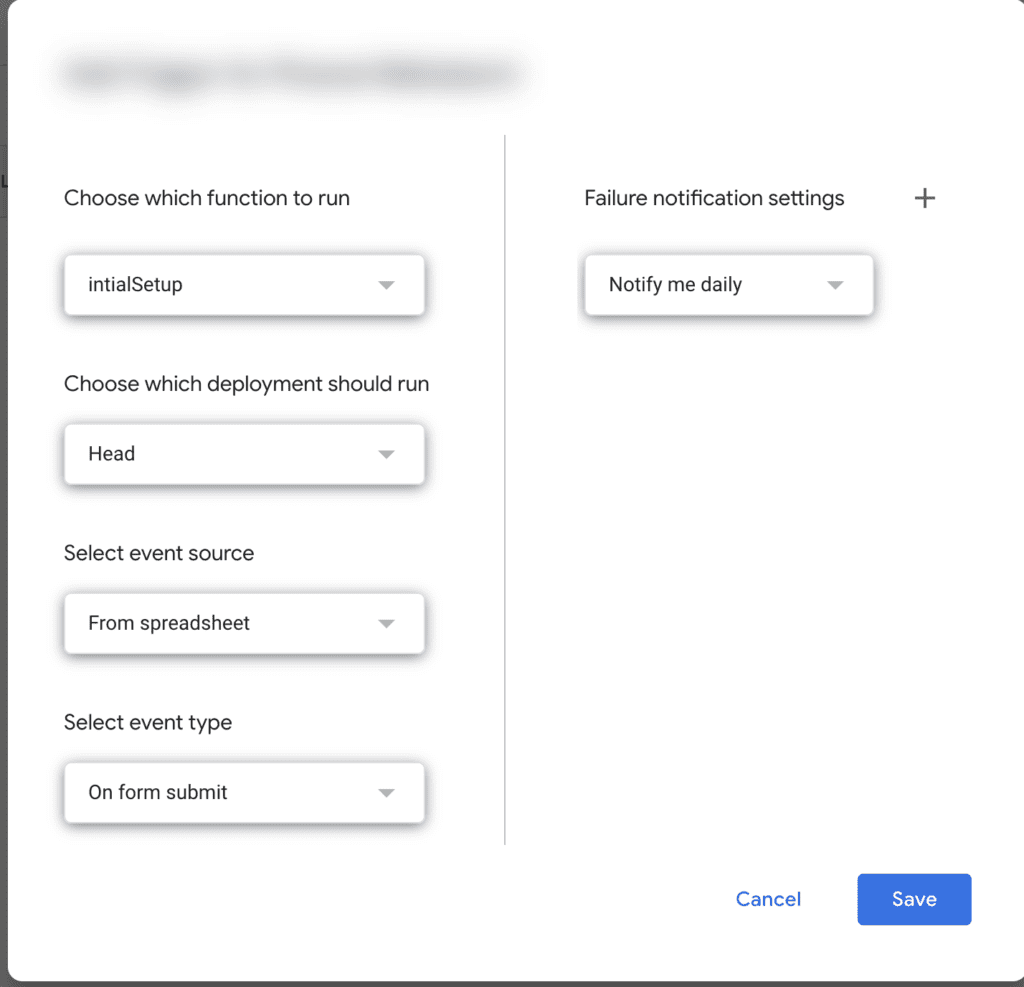
- Next Step Click on the Triggers tabs add new triggers and set the function below I have added a screenshot and click on save
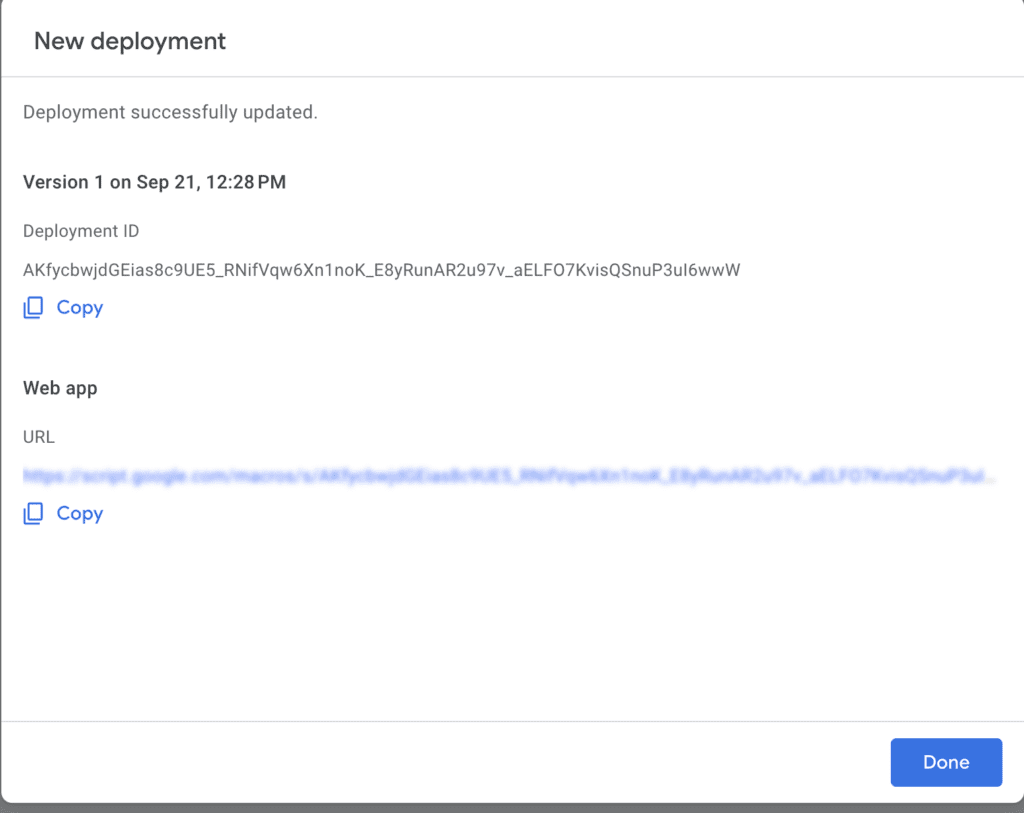
- Deploy the script as a web app and keep who has access to anyone obtain the generated URL.

- Copy this URL and now we have to use this in our HTML Form
Add the script below to your HTML File and paste the URL
<script>

    const scriptURL = 'pasteurlhere'
    const form = document.forms['google-sheet-form1']
    const submitHandler = (e) =>{
  console.log("hello");
      fetch(scriptURL, { method: 'POST', body: new FormData(form)})
        .then(response => {
          //  form.removeEventListener('submit', submitHandler);
            form.submit();
            console.log('Success!', response)
         })
        .catch(error => console.log('Error!', error.message)
        )

  }
form.addEventListener('submit', submitHandler) - After adding the above script the final step to connect with the HTML Form on the script’s second line is the document forms where the custom name you can set I have added it like google-sheet-form-1
<form name="google-sheet-form1" action="mail.php" method="POST">
                           <input type="text" name="name" placeholder="Name"
                                    class="form-control" required></div>

                           <input class=" form-control" pattern="[0-9]{10}"
                                        placeholder="Enter Contact No" id="Phone" maxlength="10" name="mobile"
                                        oninvalid="this.setCustomValidity('Enter valid mobile number')"
                                        style="color:white;" required>
                            </div>
                           <button name="submit">Submit</button></div>
                        </form>
Now Test the form to ensure submissions are recorded in Google Sheets.
If you want to get all the HTML Form Submission to the mail also you can check the below steps:
Setting Up PHPMailer for Sending Emails:
- Download PHPMailer, a popular email library for PHP, and include it in your project.
- Create a file name Mail.php and use it on the form action
- Configure PHPMailer with your SMTP settings to enable email sending.
Configuring PHP Mailer:
To configure PHPMailer, follow these steps:
use PHPMailer\PHPMailer\PHPMailer;
use PHPMailer\PHPMailer\SMTP;
use PHPMailer\PHPMailer\Exception;

require 'path/to/PHPMailer/src/PHPMailer.php';
require 'path/to/PHPMailer/src/SMTP.php';
require 'path/to/PHPMailer/src/Exception.php';
- Set up your Gmail email server, username, password, and port in the PHPMailer script.
- Create a function to send emails with PHPMailer and trigger it when needed.
// Create a new PHPMailer instance
$mail = new PHPMailer(true);

try {
    // Server settings
    $mail->SMTPDebug = SMTP::DEBUG_OFF;  // Set to DEBUG_SERVER for debugging
    $mail->isSMTP();
    $mail->Host = 'smtp.gmail.com';
    $mail->SMTPAuth = true;
    $mail->Username = 'your_email@gmail.com'; // Your Gmail email address
    $mail->Password = 'your_password'; // Your Gmail password or App Password if 2-factor authentication is enabled
    $mail->SMTPSecure = PHPMailer::ENCRYPTION_STARTTLS;
    $mail->Port = 587;

    // Sender and recipient settings
    $mail->setFrom('your_email@gmail.com', 'Your Name');
    $mail->addAddress('recipient@example.com', 'Recipient Name');
    $mail->addReplyTo('your_email@gmail.com', 'Your Name');

    // Email content
    $mail->isHTML(true);
    $mail->Subject = 'Subject';
    $name =  $_POST['name'];
    $phone = $_POST['mobile'];
    $mail->Body = 'Hello,

Good news! You have got a new lead on your contact form. Here are the details:

 Name: '.$name.'

 Phone: '.$phone.'


 You should reach out to the person as soon as possible for the best conversions! :)
 ';

    // Send the email
    $mail->send();
    echo 'Email sent successfully!';
} catch (Exception $e) {
    echo "Error: {$mail->ErrorInfo}";
}
Sending PHP Mail Notifications:
Now that PHPMailer is configured, you will receive an email whenever an HTML form is submitted and also it will get saved on Google sheet